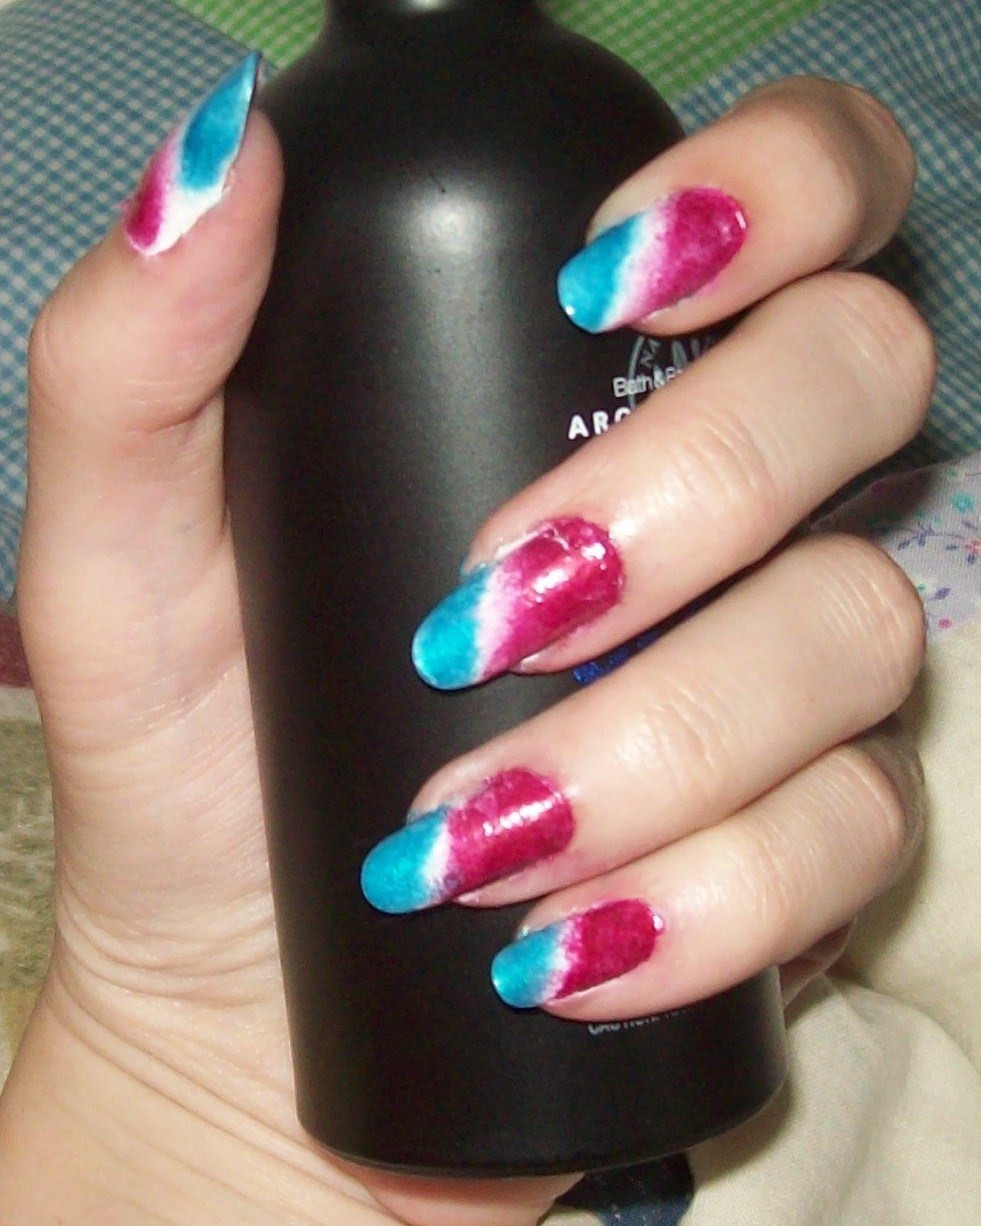
 Okay, so in the last post I covered faded nails, this time, I'm gonna cover gradient nails. This is a new technique that I tried for the first time a few hours ago. I love it, it almost looks airbrushed.<-- As you see here. (click on the picture for full size)They're patriotic because this is my weekly painting, and it overlaps with 4th Of July, therefore, it must be red, white and blue.It took me the longest time to come up with something that I liked. I even did a very time-consuming look, but didn't like it, so I had to take it all off and start over... Me and my indecisiveness. XPANYWAY! On to how to do the look.I had heard of this technique before, but hadn't really felt the need to try it until I was looking on Tumblr and saw this tutorial posted: Gradient NailsSo I decided to give it a whirl. It was simple enough. All you need is:*Nail polish colors of your choice*A foundation/cosmetic sponge*Nail polish remover*A Q-tipAll you have to do is this:* Paint your nails a base color... Or not, if you don't want to, it looks just as cool on plain nails.* Choose the first color of nail polish for your gradient and take your sponge.* Apply the polish directly to the sponge, or put some of the polish on a flat surface and dip the sponge into it. I prefer to paint it directly onto the sponge because the sponge soaks up the polish, so you would have to keep dipping it over and over... And use the corners for more precise application!* Begin patting the polish-soaked sponge onto the nail in the area you want your first color on. Mine was the red, and it got all over my fingers, but it still covered nicely. Apply as many coats as you like, I did 2-3 until I was happy with how it looked.* Repeat with the second color* Allow the polish on your nails to dry, then top with a topcoat of some sort to smooth the design. I did 2 coats to make it glossy.There you go, it's that simple! So enjoy, and be sure to link me a picture in the comment section if you try this look! If you leave a comment, check back in a day or so to see if I responded. ^-^
P.S: I got more Del Sol nail polish on my recent trip to Palm Springs! I got Island Fever, Foxy, Surfer Girl, and a backup of another color I like: Secret Crush.
"Hello. Salute. It's me. Your duke. And I made something that's real to show you how I feel. Hello, Hello. It's me, Picasso, I will paint my words of love with your name on every wall...When you leave, my colors fade to grey. Little lover stay, all my colors fade away. Every word of love I used to say, Now I paint it every day... Mya-hee, Mya-hoo, Mya-ha, Mya-ha-ha!..." *ahem* I like that song... Dragostea Din Tei in english... ANYWAY!... Speaking of fading colors, on to the topic of the day! Blended colors!As those of you from DeviantArt know, this is my most recent blended look. I did this last week, and it seemed pretty popular.
 But I also did this look a few months ago, and it was by far the most popular look I've done. People loved it... And a couple were bummed when I took it off to do a different look.(click on photos for full size.)So anyway, how do you do it? I got that question a few times, and it's hard to describe exactly how to do it other than showing the video I found on how to do it, found here: Jolleh8D's nail polish blending tutorial
No, I did not come up with the idea alone, someone else did, and I just used the tutorial they made to create a very popular look. All I can offer are tips and tricks to make the process easier for newbies:
1: Use a nail polish that is sheer enough to allow the color it overlaps on to show through, but make sure that the polish isn't so sheer that it doesn't alter the color it's fading into, 'cause then it takes forever to get it to work and usually requires a million coats, earning you a very long drying time.
2: Fade two similar colors together, it makes it easier. I tried to fade green into pink and ended up with an embarrassing and ugly mess that I won't post on here. You can find it on my DA account.
3: Cremes are harder to fade because of their opacity. If you want to use cremes, you need to actually mix the colors together where they meet, so be willing to work for it.
4: Texture is important as well. If the polishes are a different texture, it will be more difficult to blend it, but could also yield awesome results if it works out.
So there you have some tips and advice to hopefully make your blending experience go smoothly. I find that Sally Hansen Hard As Nails Xtreme Wear nail polish is awesome for blending. It's a good consistency for blending, and there is a wide variety of colors to choose from.
Here's some options that you could try using this technique:
*Try doing it in different directions. Horizontal, diagonal, vertical...
*Try fading different shades of the same color.
*Try fading different colors on each nail.
*Try doing a faded french manicure by fading nail polish on the tips of your nails, then shaping it into a french manicure by using a nail polish remover-soaked Q-tip to remove any excess and shape it just how you want it.
*Add a cool topcoat to add some extra pizazz. Try a tinted topcoat, glitter, a mattifying topcoat, or glow in the dark nail polish. I also have blacklight reactive nail polish that I would like to use sometime... But I'm not quite the rave/clubbing type, haha. I'll have to go to an arcade or Killer Pizza From Mars sometime.
*Try doing a Yin/Yang design with a solid color on one side, and faded colors on the other.
*Add in black as an accent color to your faded colors design.
So get to it, dear readers! Send me a link to a picture of your design in the comment section if you attempt it, and don't hesitate to ask if you have any questions about something I didn't cover or wasn't clear on anything. I'll add a comment answering your question as soon as I can, so check back to see if I responded to your comment!